
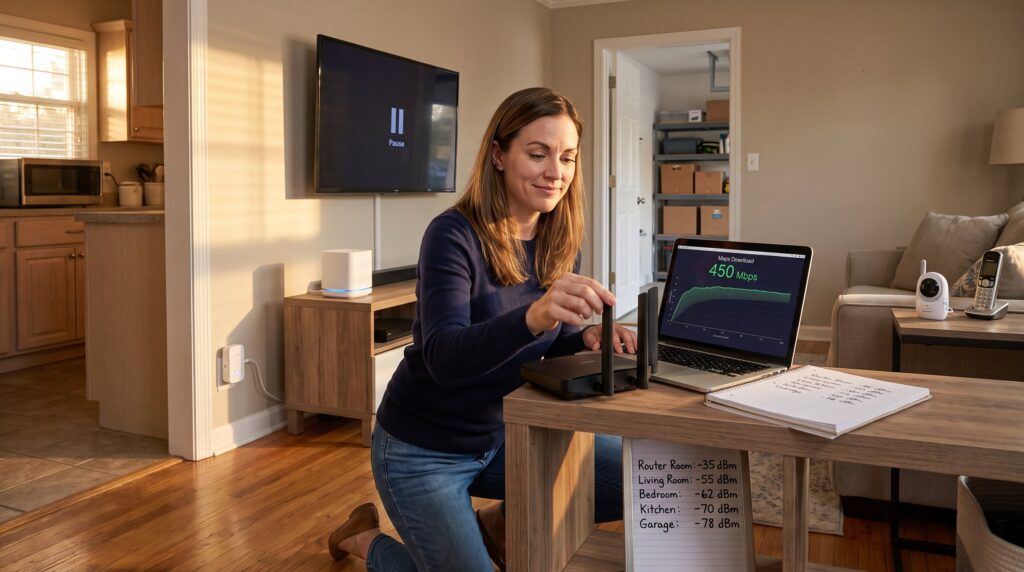
How to improve Wi‑Fi coverage at home starts with a quick check of where signal fails and why. This guide shows straightforward diagnostics, placement fixes, firmware tweaks, and realistic upgrade choices for 2026 homes. Readers get clear, actionable steps they can test in 10–30 minutes and upgrade paths when quick fixes aren’t enough. The advice is device-agnostic and focused on delivering consistent speeds for video calls, streaming, and smart-home devices.
Key Takeaways
- Improving Wi-Fi coverage at home begins with a five-point walk test to identify weak signal areas and their causes.
- Placing the router in a central, elevated location away from metal objects and interference sources significantly enhances coverage.
- Regularly updating router firmware and optimizing settings like channel selection and band steering boost range and stability.
- Choose Wi-Fi extenders for single dead spots, mesh systems for whole-home coverage, and powerline adapters for homes with thick walls and suitable wiring.
- Start with diagnostics and placement fixes before investing in hardware upgrades to get the best return on improving Wi-Fi coverage.
How To Quickly Diagnose Wi‑Fi Coverage Problems
Start with the fact: the fastest way to diagnose coverage is a five-point walk test that measures signal and speed in real use locations. He or she should open a speed test app or the router’s signal meter and record results in five key rooms: router room, living room, bedroom, kitchen, and garage.
What to log: signal bars (or dBm), download/upload speeds, and a simple note about visible obstructions (metal cabinet, microwave, concrete wall). For example: “Living room, 55 dBm, 120 Mbps down, behind TV cabinet.” That level of precision shows whether the issue is distance, interference, or ISP rate limits.
Quick checks to run next:
- Reboot: power-cycle the router and modem for 30 seconds: many transient issues clear.
- Single-device test: move a laptop within 3 feet of the router: if speeds jump, the problem is coverage, not the ISP.
- Wired baseline: plug a laptop into the modem via Ethernet. If wired is slow, contact the ISP, the router isn’t the bottleneck.
Common diagnostic discoveries: thick walls create signal shadowing: microwaves and baby monitors cause intermittent drops: and older routers may cap throughput even though fast plans. After logging these, the next sections map fixes to the root cause.
Practical next step: keep the five-point notes. They inform whether a placement fix, a setting change, or a hardware upgrade will deliver the best ROI.
Best Router Placement Practices
Fact first: moving the router 2–3 meters to a higher, central spot often fixes most weak zones. Placement matters more than buying an expensive extender.
A simple experiment: place the router on a shelf 1–1.5 meters off the floor and rerun the five-point walk test. He or she will usually see a 5–15 dBm improvement in rooms that were previously dead spots.
Why this works: Wi‑Fi radiates outward and downward. Elevation reduces floor and furniture blockage. Central placement minimizes the total distance to devices and cuts the number of walls the signal must cross.
Placement Dos And Don’ts:
Placement Dos And Don’ts
Do:
- Put the router in a central, elevated location near the home’s activity hub (living room or hallway).
- Angle adjustable antennas vertically for wide horizontal coverage.
- Keep the router away from large metal objects and fish tanks that scatter signal.
Don’t:
- Hide the router in a cabinet or behind the TV: that can reduce signal by 10–20 dBm.
- Place the router next to cordless phones, microwave ovens, or baby monitors that use 2.4 GHz bands.
- Tuck the router on the floor of a closet: floors and doors absorb signal.
Real scenario: a three-bedroom apartment showed streaming stutters in the master bedroom. Moving the router from a corner by the TV to a hallway shelf cut packet loss and eliminated rebuffering.
After placement changes, rerun the five-point test. If coverage still has holes, the article moves to settings and firmware updates.
Update Firmware And Optimize Router Settings
Direct insight: outdated firmware or default settings can limit range, stability, and security. Updating firmware and tweaking key settings often improves coverage without extra hardware.
Start by logging into the router’s admin page. Check the firmware version and apply updates from the manufacturer. Firmware updates can yield measurable gains: manufacturers sometimes improve radio calibration and add band steering logic that reduces contention.
Key Router Settings To Change For Better Coverage
Key Router Settings To Change For Better Coverage
- Channel selection: set 2.4 GHz to a low-congestion channel (1, 6, or 11) or use automatic channel scanning if available. Manual testing can reveal a quieter channel in apartment complexes.
- Band steering: enable band steering so dual-band clients use 5 GHz for speed and 2.4 GHz for range. This reduces overcrowding on 2.4 GHz.
- Transmit power: increase transmit power modestly if the UI allows (avoid maxing out if the router overheats).
- QoS limits: deprioritize background updates and prioritize video conferencing apps to keep meetings stable in low-signal areas.
- SSID separation: avoid naming the 2.4 GHz and 5 GHz bands the same only if older devices misconnect: otherwise unified SSID simplifies roaming.
Warning: some changes, like boosting transmit power or enabling experimental features, can increase heat and occasionally reduce reliability. Apply one change at a time and retest.
Practical note: firmware updates and settings changes are best paired with placement tests. If coverage improves after a setting change, log the config so it can be restored if a future update resets defaults.
Choosing Between Extenders, Mesh, And Powerline Solutions
Bottom-line answer: choose a solution that matches the house layout, budget, and device mix. Mesh works best for whole-home coverage: extenders help targeted dead spots: powerline suits homes with thick walls but wired electricity that’s on the same circuit.
How to decide:
- Single dead spot near the router: a small directional extender can be the cheapest fix.
- Multiple floors or long distances with open layouts: a mesh Wi‑Fi system creates a single, managed network with consistent handoff.
- Solid concrete walls or historic homes: powerline adapters (G.hn or HomePlug AV2) often deliver better real-world throughput than a struggling wireless link.
Concrete example: a 2,500 sq ft bungalow with stone walls saw 40–60 Mbps using a mesh kit with three nodes versus 5–20 Mbps with a single extender. Mesh gave consistent roaming during calls.
Buyer guidance:
- Check for dedicated backhaul: tri-band mesh units with a dedicated backhaul link preserve speed between nodes.
- Match Wi‑Fi generation: replace an aging router with a Wi‑Fi 6E or Wi‑Fi 7-capable mesh only if client devices support it: otherwise, gains are limited.
- Powerline caveat: results vary with wiring quality: expect fluctuating speeds if circuits pass through different subpanels.
A useful resource on comparing options and diagnosing extenders versus mesh can help. For broader context on connectivity and privacy best practices, consult the site’s pillar on connectivity and security in the connectivity guides.
Conclusion
Takeaway: most home Wi‑Fi problems resolve with structured diagnosis, smarter placement, and a few targeted tweaks. He or she should start with the five-point test, then adjust placement and settings before buying hardware. When upgrades are needed, match the solution to the home’s layout: extenders for quick fixes, mesh for whole-home coverage, and powerline where wiring helps. Small, measured changes save money and give reliable signal for streaming, work calls, and smart-home systems.